HumminBird Helix 7 Review (Looking at Chirp DI G2, Chirp SI/GPS and Mega SI)

Humminbird has built a name for itself as one of the best fish finder manufacturers in the business. The Helix 7 is perhaps one of their most popular products as it comes in a ton of variations, each with their own unique features, that both amateurs and professionals will love. We’ll look first at the base model and review it, then we’ll talk about the variations and all the extra features that you can get with them. You’ll see why Humminbird is the premier name in fish finders, and why the Helix 7 is ideal for most people on the open waters. (I looked at the 9″ version here.)
Display Size and Resolution
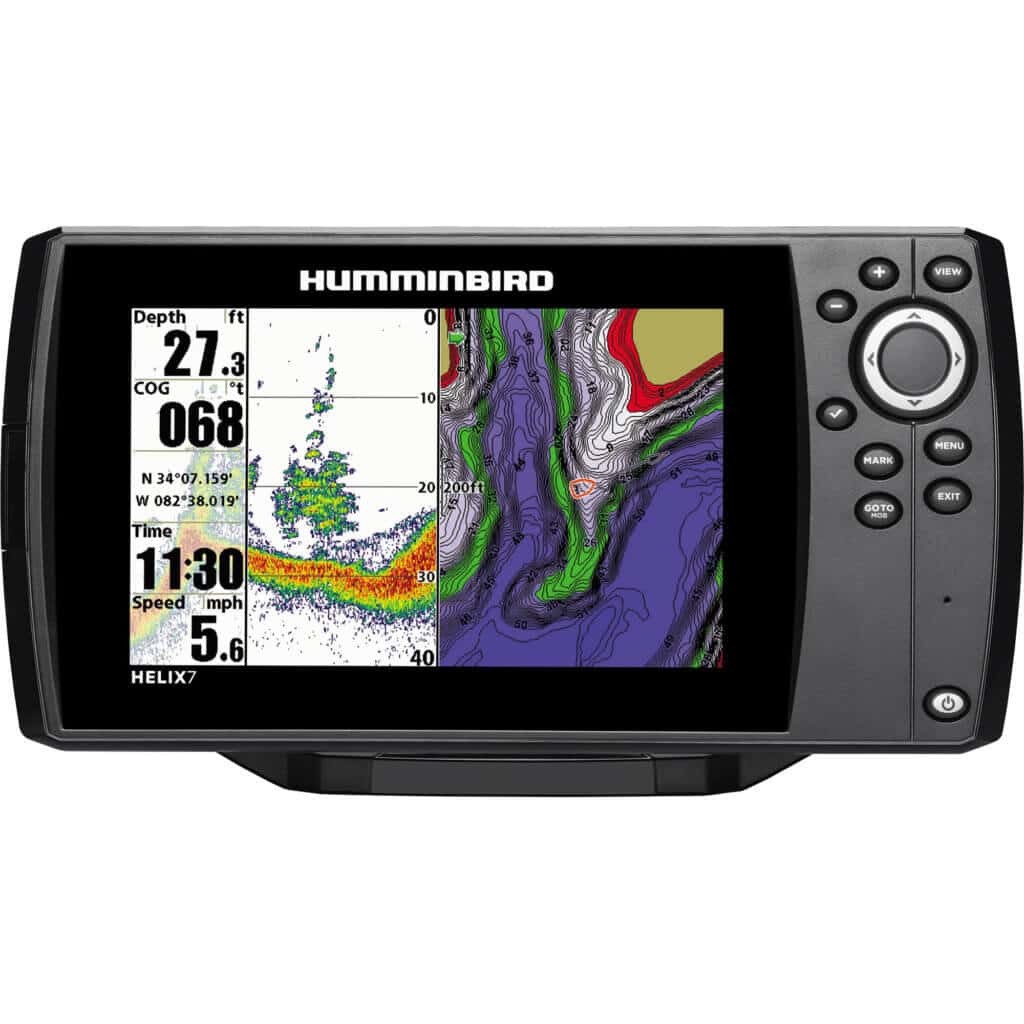
As the name implies, the Humminbird Helix 7 has a 7-inch display, which should be perfect considering all the data you’ll be interpreting from the sonar and GPS (which is included with the majority of variations). The resolution is 800-by-480 pixels and shows 256 colors, and believe me, all of those colors will be used as you find the perfect place to fish and determine how many fish are under the water. There is also LED backlighting to make the images clearer and easier to see.
Worried about sunlight? The display is made to work even in harsh, bright environments, ensuring that you can use it all day. The display is secured with bonded glass. Those with the Helix 5 know that plastic is the default material for that particular model, but this glass enclosure keeps the display safe from water, along with enhancing the image.
In general, the image and enclosure are superior to most other fish finders out there, ensuring that you have a fun time finding fish instead of fighting with the device.
Enhanced Memory
All modern versions of the Helix 7 come with double the RAM, which is essential considering all of the data that should be captured. Some people complained about the earlier versions of Helix 7 (and other similar fish finders) because the RAM was so low that the images would sometimes lag or not display properly.
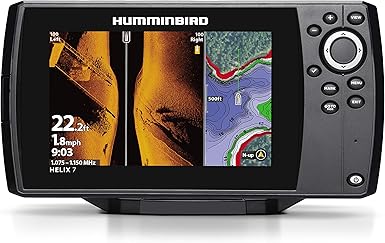
Since Helix 7 commonly displays side-by-side images (some models even show three images simultaneously), you could see how problems would quickly arise. The increased RAM will keep the images fluid and in real-time. Lags are now incredibly rare, so you shouldn’t miss the big one or accidentally miss a school of fish as they swim by.
Clarity is the name of the game, and Humminbird is a leader in this category. All images will be as clear as possible, and they’ll stay in real-time throughout your journey.
GPS Capabilities
The base model comes with a GPS, but there are some models that lack the GPS, normally making them a little more budget-friendly. GPS with a fish finder isn’t exactly essential, but it’s very helpful if you’re going to new waters or water a big overview of your area.
You’ll be able to track your location and speed, along with general depths around your area, making it easier to find new areas to fish depending on your preferences. GPS capabilities allow you to set waypoints and routes, helping you go the whole day without getting lost and ensuring that you hit all the spots you want. You can program up to 45 routes and 4,500 waypoints with the Helix 7.
While the Helix 7’s GPS doesn’t stand out too much from the crowd, it’s functional and gives you all the features you would need for an adventurous fishing trip.
Power, Frequency, and Depth
Helix 7 is one of the stronger fish finders out there, especially considering its price point. It has a transmit power of 500W and 4,000W peak-to-peak. The sonar frequency operates at 83/200 kHz with 2D imaging and 455 kHz side and down imaging (not included in all models, will be discussed lower).
Depth is a respectable 1,500 feet for 2D images and 100 feet for side imaging. There are some fish finders with better depth, but they are typically more expensive. In general, this should be enough for most people when looking for fish. However, if you plan on very deep fishing, then you may need a model with better depth.
SwitchFire Imaging
SwitchFire Imaging is included in most Helix 7 models. This is Humminbird’s interpretation of the TVG (“Time Variable Gain”) found on other fish finders. This is a type of 2D imaging that creates multi-colored views that improve overall clarity. It comes in two types: Clear and Max. You can switch between them at will.
Max is good to start with as it gives you a view of thermoclines, currents and fish representation. Once you have found a good spot, switch to Clear view. This removes much of the noise from other objects and gives you a clear and true view of fish sizes. You’ll see if the fish are really worth stopping for, or if you should move on.
In comparison to other fish finders, Clear view is like having TVG on while Max is TVG off. Having the ability to switch between views can be very helpful to determine what is under the water and if it’s worth fishing for.
Imaging: Side-Imaging and Down-Imaging
Look for Helix 7 models with either SI or DI in their name for side-imaging or down-imaging, respectively. For example, the Humminbird Helix 7 Chirp MEGA DI GPS G3N CHO Fishfinder has down-imaging, while the Humminbird, Helix 7, CHIRP MEGA SI GPS G3N has side-imaging.
Now that we have that covered, what are side-imaging and down-imaging?
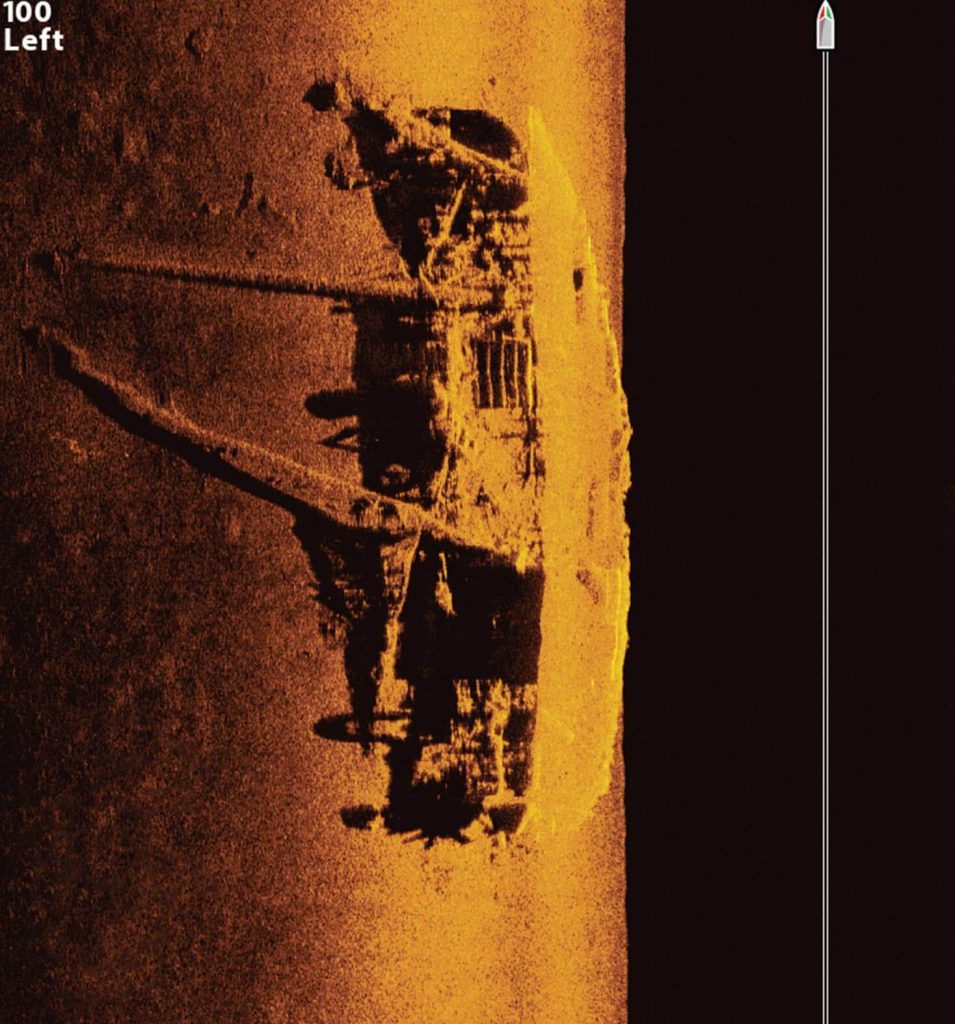
Side-imaging is a type of sonar scan that lets you see the left and right of your boat. In other words, it allows you to see the sides, creating a 180-degree image that makes it much easier to scan the water for catchable fish. This ensures that you don’t miss something that’s just to your side. The Helix 7 can do side-imaging up to 100 feet in depth.
Down-imaging can be considered the opposite of side-imaging. It gives you a fish’s POV, helping you easily see what’s at the bottom of the water with particular focus to detail. Most sonar scans will give you a blurry image of what’s under the water. Down-imaging uses incredibly clear images, helping you distinguish objects and anything else the sonar picks up. This helps you see if you found a fish, garbage or something else under the water.
Neither is required, but it makes the chase much easier, allowing you to focus on the “fishing” aspect of fishing, rather than the finding aspect where you go all over the place, hoping you found something worth your time.
Mega Side Imaging vs. Side Imaging
Humminbird Helix models include Mega Side Imaging and you might be wondering how this compares, and how it’s different, from regular side imaging. Is it just a fancy marketing term to make it sound better, or is this actually useful?
While the word “mega” sounds powerful, there’s another reason why Humminbird chose this word. Like every other sonar type, this relies on a certain frequency when emitting the beam. Most side imaging types use kilohertz, or kHz, because this balances both distance and clarity. Mega side imaging goes up to the megahertz, or mHz, with the highest frequency usually being 1200kHz (anything over 1000 here would count as megahertz).
So, what does this do and how do mega side imaging vs side imaging compare? As the frequency increases, the clarity increases as well. Mega side imaging is ideal for making the sonar reading as clear as possible. This allows you to easily make out fish, underwater structures, hard bottoms, shadows, and more. It basically gives you a live photograph of what’s around your boat.

However, notice how we said that regular side imaging balances distance and clarity. Mega side imaging prioritizes clarity. As the frequency and clarity increase, the distance decreases. Mega side imaging is usually much shorter than regular side imaging, sometimes by a couple hundred feet.
If side imaging is your preferred type, then it’s best to use regular side imaging until you’re closer to your target. Then, switch to mega side imaging to get a clear view and to cast your line in the right direction.
Overall, while they work best in tandem, you’ll probably find that mega side imaging is more useful in actually catching fish. The clearer image ensures that you can easily find fish, while traditional side imaging is a little harder to make out.
Both of these offer Mega imaging, whether it be Mega Side Imaging or Mega Down Imaging. The Humminbird Mega imaging types use higher frequencies for enhanced resolution, but the distance is often shorter than traditional side imaging or down imaging. Alternate the frequencies as necessary until you reach your target.
CHIRP Sonars
Have you heard of CHIRP sonars? This started as a military tech and slowly moved its way to recreational sonars for fishing. Standing for “Compressed High-Intensity Radiated Pulse,” this gives you clearer images than ever by using a sweeping frequency as it scans the water. What you get is unprecedented clarity. You can find this with several Helix 7 variants, such as the Humminbird Helix 7 Chirp MEGA DI GPS G3N CHO Fishfinder.
If you are very serious about finding fish and want to know exactly what’s down there under the water, then CHIRP is a necessity. Not only that, but it’s just fun to play with this new tech and see how powerful it is.
Conclusion
In general, the Humminbird Helix 7 fishfinder models are simply amazing. They come at an affordable price point, but you’d expect them to be more expensive considering the wide array of features you get. The default model comes with GPS, amazing memory, SwitchFire, and a great resolution. There are also other models with side-imaging, down-imaging, CHIRP and other features that you’re sure to love.
Perhaps the only downfall is that Helix 7 cannot communicate with other Helix models, but that’s relatively minor. If you love fishing and want to up your game, then the Helix 7 is the right model for you.
You might also want to check out my best fish finder post to browse more models out there.


